Warning: maaaaaaaaaaaaany photos are in store!! If you are in a hurry, do not attempt to read this entry!! :)
************
If you have read my about me page, you might remember that I said something about having an open mind about what “designing” might appear on this site. :) So, today is a first for me—a baby girl’s dress tutorial! :) I have been in the mood for a *while* to sew something, and I found some gorrrrgeous cotton fabric at the store a few weeks ago, when I was running away from whiny family members and their sick germs. :) I immediately decided to make a dress for Madi, and I also decided to come up with the style on my own, rather than buying a pattern (so economical of me!) ;) I did a lot of reading/”researching” online for what style of dress I wanted to make, looked at a lot of different ideas, and in the end came up with something that I really like! I downloaded a bodice pattern for free here at Living with Punks, and I used that for the back part of the bodice, but modified it for the front, all of which you’ll see below.
I also want to make a full disclaimer: I do NOT claim to be any sort of professional seamstress! I have never taken “sewing classes” other than learning from my own wonderful mother, :) and I’m sure there might be other, better ways of doing some of the things I’ve done here! The reason I am posting this is just to show that you don’t necessarily have to buy a pattern, or even follow one entirely if you are using one, to make beautiful clothing! I don’t recommend “shortcuts” in sewing, but I do recommend creative, “outside-the-box” thinking! Especially with little kids, you can get away with some pretty forgiving shapes and everything doesn’t have to fit just like a glove. So look around, be creative, and make something! :)
*****
Without further ado, buckle up your seatbelts for this wild ride of a tutorial! :) I told my mom earlier today, my original thought was to just post a basic, “beginner” level dress to show how simple it could be, and this did not turn out to be that dress. :) If you aren’t very comfortable sewing, or have never made clothing before, you might be a little confused reading through the steps. However, I will be as THOROUGH as HUMANLY POSSIBLE in the instructions, and if you try it, I bet you’ll be able to figure it out! And if not, you could always shoot me a message here, and I’ll help!! :)
The first rule of thumb if you are going to be coming up with your own pattern, is to PLAN, PLAN, and PLAN SOME MORE. I am a big proponent of “just winging it,” but that would NOT have worked with this dress. I spent probably a good hour sketching and thinking through exactly how I was going to put it together, after I finally decided how I wanted it to look; and I made a partial “test dress” out of scraps I had lying around to make sure I knew what I was doing. So just think it all through, write all the steps down if you need to (I did this, and it really helped keep me on track) and then go for it!
After you have your plan all laid out, you need to get all your supplies ready and actually cut out the pieces. Of course. :) For this dress (I made a size 2T), you will need the following:
1 yard main fabric
1/2 yard contrast fabric
Coordinating extra wide, double fold bias tape
Matching thread (it will need to match the main fabric and the bias tape, or coordinate, or contrast, however you want it. I matched.) :)
Two buttons
***
Then you will cut your fabric into the following:
Main fabric: cut skirt piece from the entire length of the fabric (44″ usually) and as long as you want the skirt to be for the other dimension (plus seam allowances.) So keeping in mind that this dress has a little bit of a raised waist, if you want your skirt to be 14″ long or so, leave an extra inch for the seam allowances and cut your piece 15″x44″. You will also be adding a border to the bottom of the skirt from the contrasting fabric, so you could make your skirt a couple inches shorter in the main fabric if you wanted. I planned to make mind a little big, since it is a 2T and Madi is wearing 18-24 mos. right now, so I made it a little long. I cut my skirt piece 14″x 44″ from the main fabric.
If you are using the bodice pattern from Living with Punks, make sure you position it on the fold, and then cut two of those (I lined the bodice, which is why you need two); this is for the back of the bodice, outside and lining.
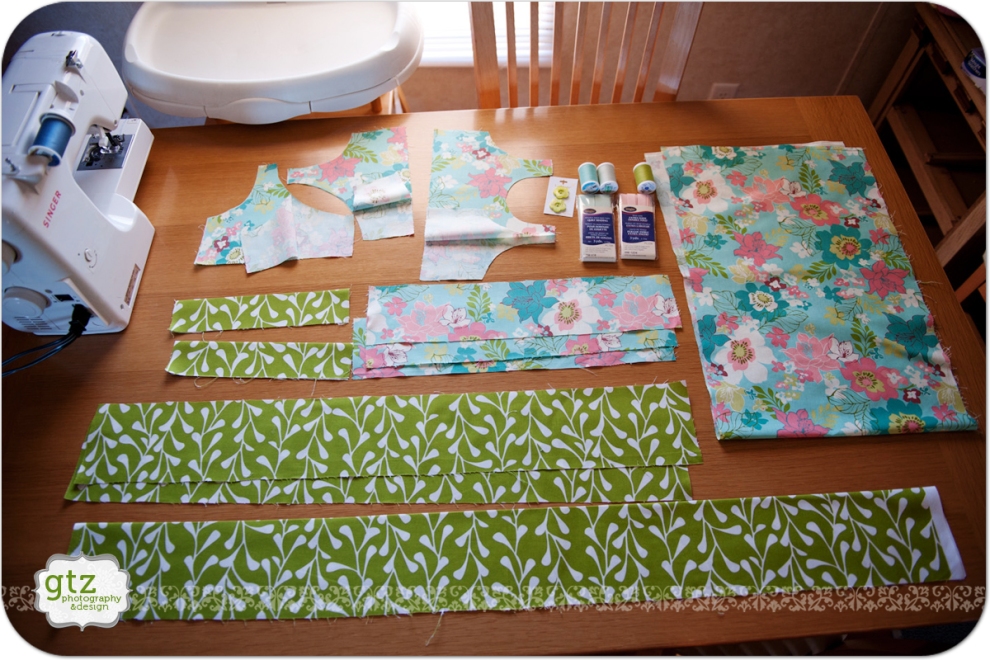
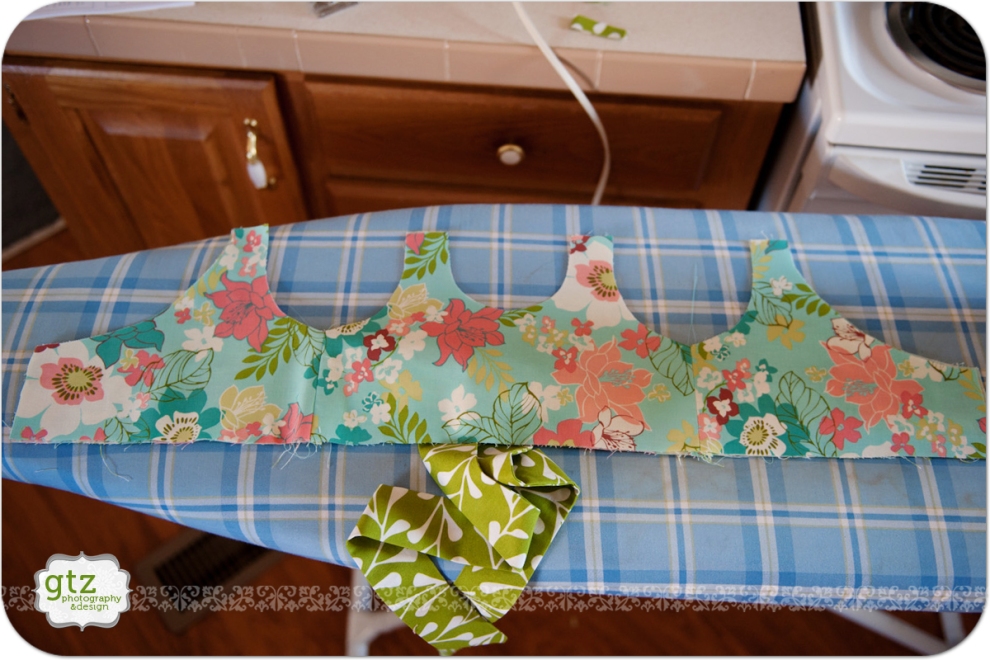
I then modified the bodice pattern for the front of my dress; I decided to make mine a wrap, so I wanted it to overlap about 5″ in the front. I took the bodice pattern (which is only half of the actual shape of the bodice, since you cut it on the fold) and traced it as is, but extended the “middle” side out another three inches. Then I re-shaped the top or neckline so that it would form a V when it crossed over the other side, rather than just the regular scooped shape that it was. You can see the front bodice pieces at the top left of the photo below. Fold the fabric in half, wrong sides together, and cut out the modified bodice pattern (not on the fold) through both layers; now do that again. You should have in total, two bodice pieces for the back of your dress, and four bodice pieces for the front of your dress (two for the “outside” and two for the lining.)
For the neckline ruffle, I cut three strips, 4″ x 18″. I didn’t have enough fabric to cut it all in one long strip, which is why it is in pieces. I found that it might have been just as nice or better to have cut them 3″x 16″ or so, as I thought my ruffle turned out a little extra wide, and almost a little “too” ruffly.
Contrasting fabric: cut the border piece that will go along the edge of the skirt from the entire width of the fabric (44″) just as you did the skirt. I made mine 44″ x 8″, keeping in mind that I was going to fold the piece in half lengthwise (as it is shown at the bottom of the photo below) and then hem it. Taking into account the hem and overlapping the bottom of the main skirt, it added about 3″ to the length of my dress.
Cut two belt pieces if you are making a belt; mine were approximately 4″ x 30″.
Cut out two front “faux” belt or sash pieces. These need to be the width as your two front bodice pieces; I think mine were approximately 9″ (?? I just held them up to the bodice piece and cut them the same width) x 4″. They are shown in the photo here at left center, folded in half wrong sides together.
Finally–you have all your fabric cut and ironed and laid out where you can find it all. :) Now you are ready to start!
(All of my seams are 3/8″ unless otherwise noted.)
***
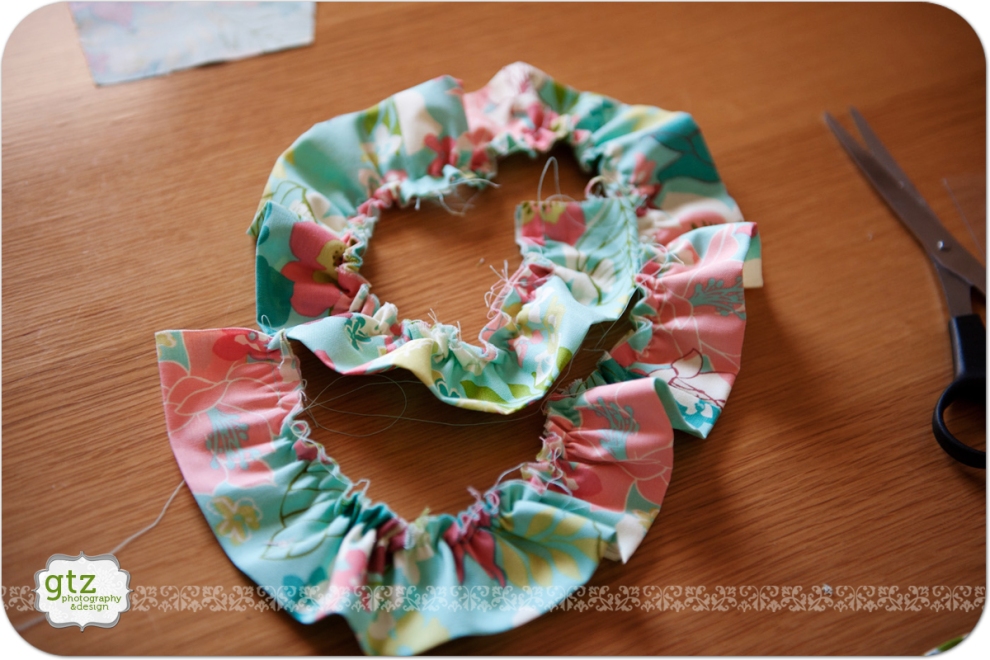
First make the ruffle for the neckline, so you have that out of the way. Sew your three ruffle strips together, end to end, to make one long strip. Mine was 4″ x 51″ or so when I had it all sewn together. Iron your seams *open* on the back. Always make sure to iron as you go to keep your project looking neat and laying nice and flat inside the seams. Then fold the entire strip in half the long way, ironing it to keep it nice and even. Pin it if you feel like you need to (I didn’t pin it as it was such a thin strip, it was easy to hold onto and keep in place) and then gather it by running a basting stich along the entire long edge (the unfinished edge, not the fold.) Pull the bottom (bobbin) thread from each side, gradually pulling it up into gathers or ruffles, and spreading them out as you go. With such a long strip, you will want to be careful that you don’t break your thread by pulling too hard. ***My mom always tells me that it works better if you run two basting strips about 1/8 or 1/4 inch apart, rather than just one, the length of the piece, and then pull both bottom threads at the same time to gather. I’ve done it that way before, and I think it does make a more even gather; I was in a hurry here, so I just did the one. I wish I had done two though, as I think it would have made it easier.*** You don’t need to make it any specific length right now; you’ll match it up to your neckline later. Just make a nice little gathered ruffle and set it aside for later.
***
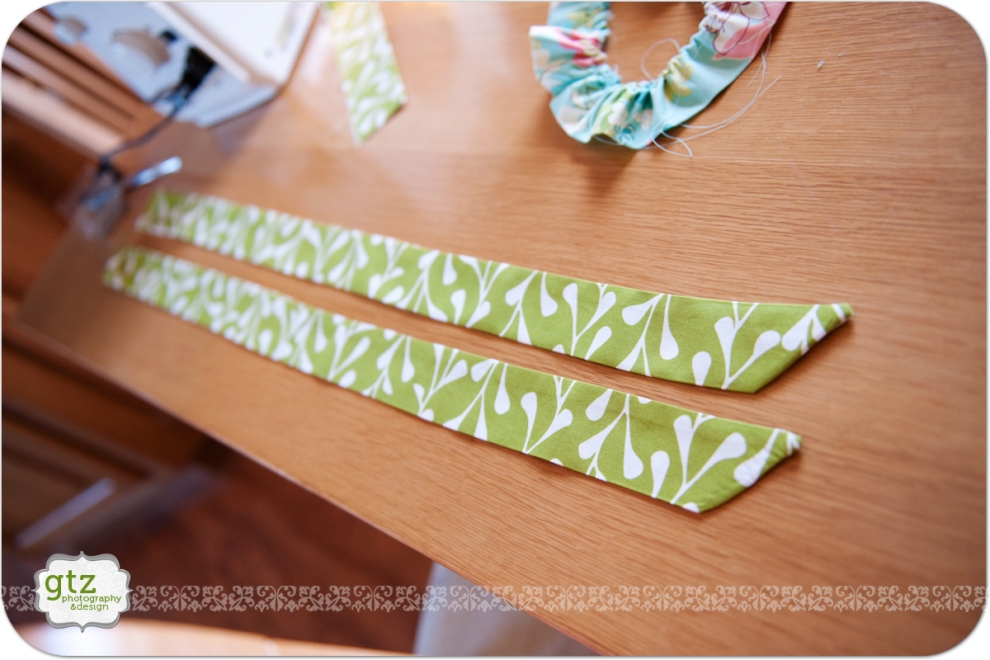
The next step to get out of the way is to make the belt pieces. Individually, fold your belt strips in half lengthwise, right sides together, but do not iron; simply line up the edge and pin as you go. Then sew all the way along the unfinished edge, and sew across the little short end where you finish (leaving the other short end open). I sewed my short ends diagonally; you can do that or straight across. I like how the pointed end looks on the belt, and it’s not any harder, so that’s why I chose it. Then turn the entire strip right side out; you can do this with a safety pin or just by sticking your finger down inside it and pulling it right-side out, which is what I did. They’re not TOO skinny, so it wasn’t super difficult. Iron them nice and flat and set them aside.
***
The next thing I did was to attach the border to the bottom of the skirt piece. I decided to try something a little different; rather than hemming each piece separately, and then just sewing the border onto the skirt and leaving the open edge of the border inside (no, I don’t have a serger!) I decided to try it a little differently, and I think it worked out well. Here’s what I did:
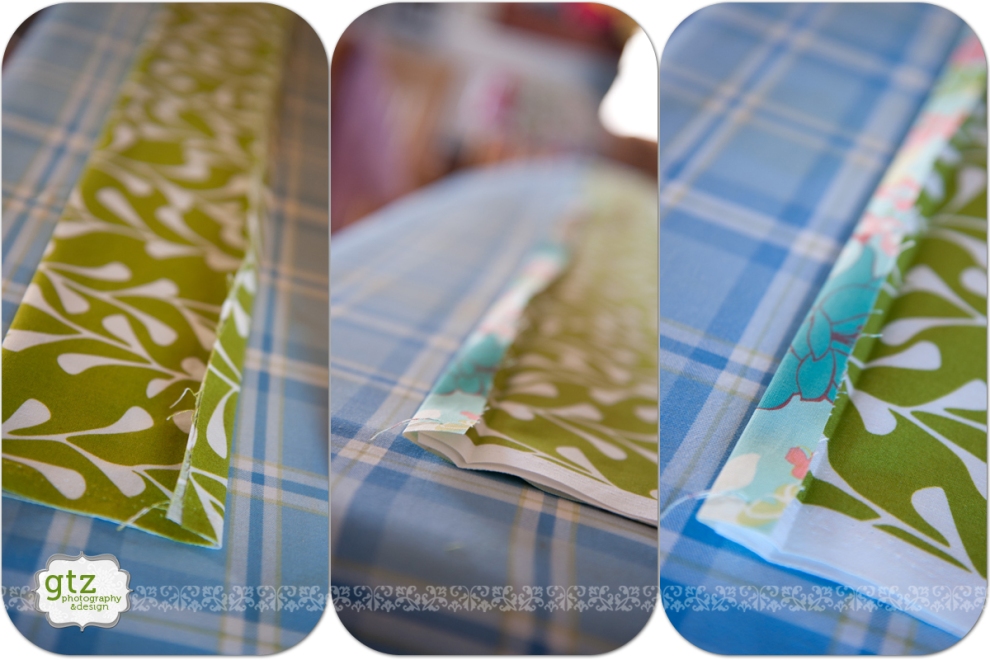
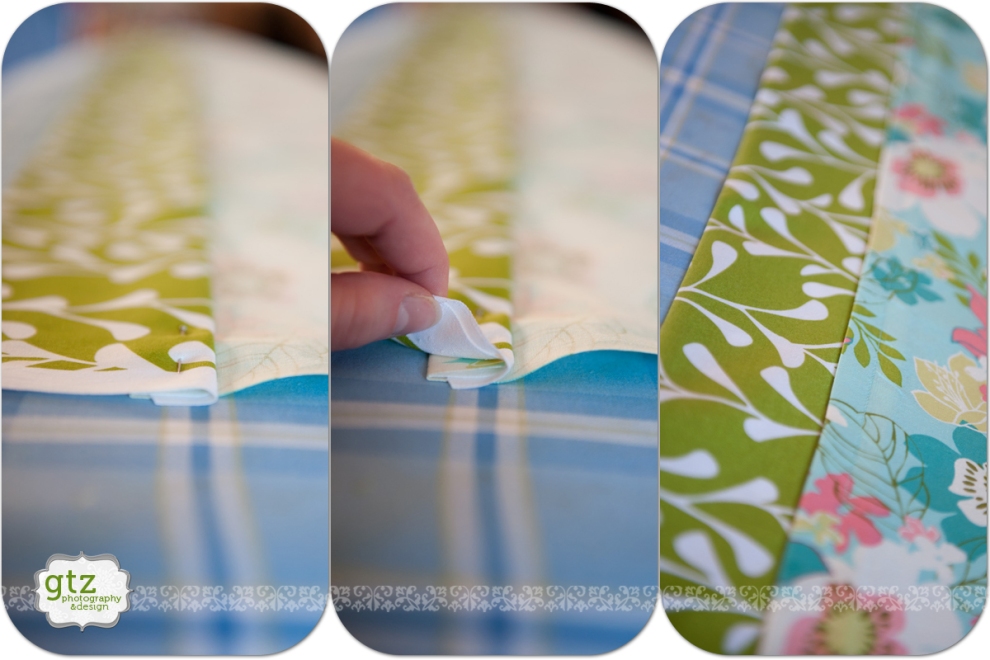
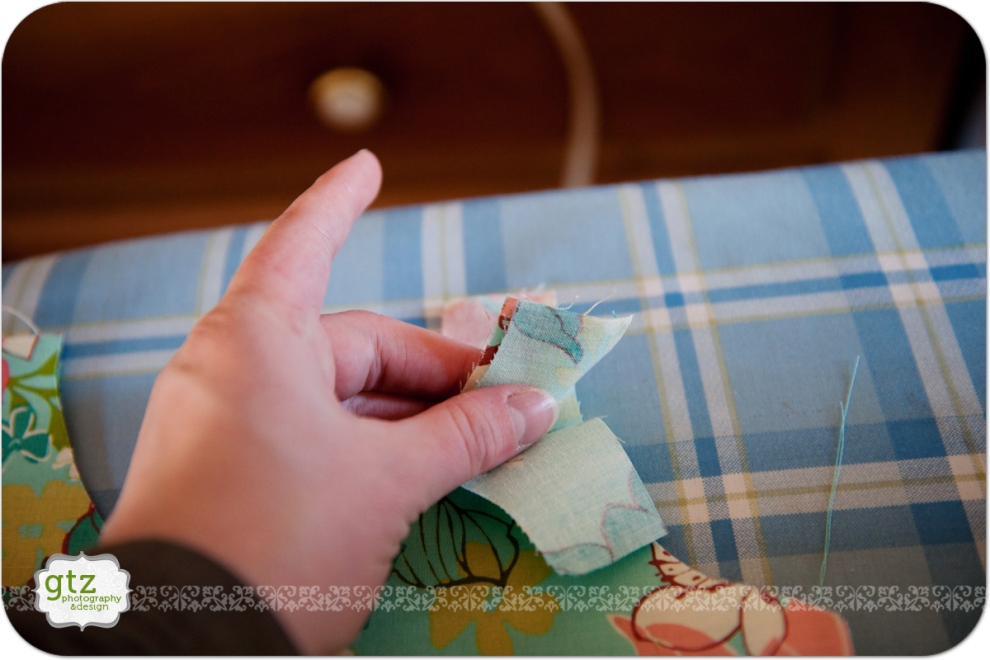
Fold the border strip in half lengthwise, wrong sides together, and iron. Fold both unfinished edges down together approximately 5/8″ or 3/4″ and iron. Set aside for a moment. Fold the bottom edge of the skirt piece over the same width as you folded the edge of the border over, 5/8″ or 3/4″, and iron. Lay the skirt piece out, wrong side up, with the folded edge closest to you. Lay the border piece along the edge of the skirt, so the folded piece folds up and over, rather than underneath, but unfolded. Line up the unfinished edge of the border right in the crease of the fold you made on the skirt piece (see middle photo below.) Fold the skirt edge over the border edge (see right photo below); these two “folded” pieces should be the same width and should line up perfectly. Then fold the entire border down over the edges you have so carefully lined up, and pin through all of the layers. :)
***
In the photos below you can see how I have pinned it on the left; in the middle you can see how the edges are folded up inside of each other in between the border and the skirt; and then on the right you can see how I have sewn them all together, as seen from the front or right side of the skirt fabric. :) I think I sewed this pretty much right down the center of the little folded up section.
***
Here is how it looks on the wrong side of the fabric–no open edges whatsoever, nothing to unravel!! Victory!! :)

***
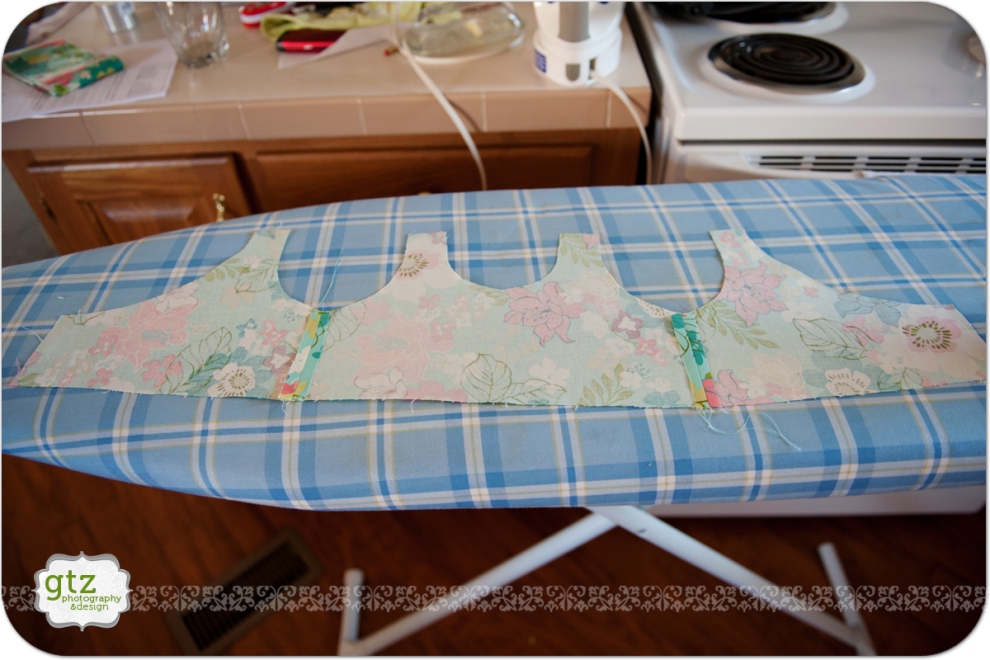
The next step is going to be sewing the lining of the bodice together in one long strip. It helped me not be confused about what piece went where, if I laid the entire “outside” of the bodice down, end to end, wrong side up; and then lay the lining down on top of it, matching up the pieces, right sides up. Pin the lining edges together, right sides together, sew them, and iron the seams open. I think I made these seams more like 1/2″ just because the lining needed to be a TINY bit smaller than the outside pieces, since it needed to fit inside! :) Here is how it should look all sewn and ironed (here it is wrong side up; cell phone, random papers, bib, and butter dish in background not necessary.) ;)
***
Next you need to pin the outside of the bodice together–but you have to include the belt pieces and sash pieces, so it’s going to take more thought than the lining did. ;) The best way to accomplish this is:
Lay the back bodice piece out in front of you, right side up. The belt is going to tie at the back of the dress, so you’ll need to do the belt pieces next. Line up the unfinished edges of the belt pieces with the sides of the bodice, one on each side, but about 5/8″ up from the very bottom of the bodice. You don’t want them even with the bottom, raw edge, because that is going to be sewn together with the skirt–and you don’t want your belt to be stuck down inside the waistband. The length of the belt pieces will be toward the center of the bodice; you can just pile them up somewhere there in the middle for this part; I actually tied mine together loosely just to keep them out of the way of my pinning and sewing at the edges.
Next line up the sash pieces right on top of the belt pieces, with the fold on top and raw edges on bottom; one unfinished side should be lined up with the unfinished sides of the bodice and belt, with the top of the sash lined up with the top of the belt. The raw bottom edge of the sash will extend further down than the belt did; this is good, because you DO want your sash to be sewn up in the waistband!
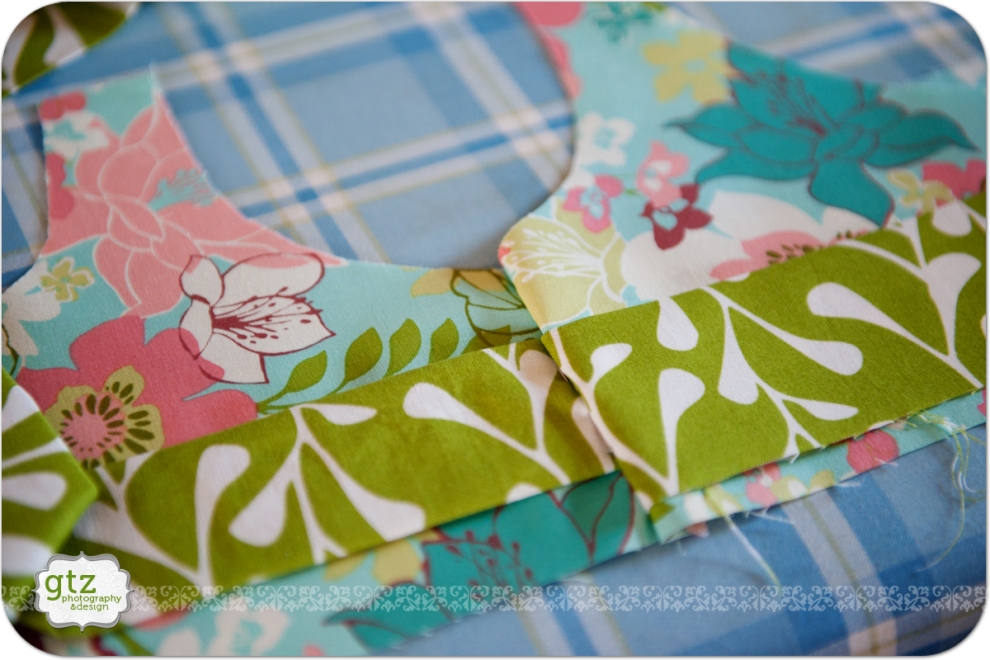
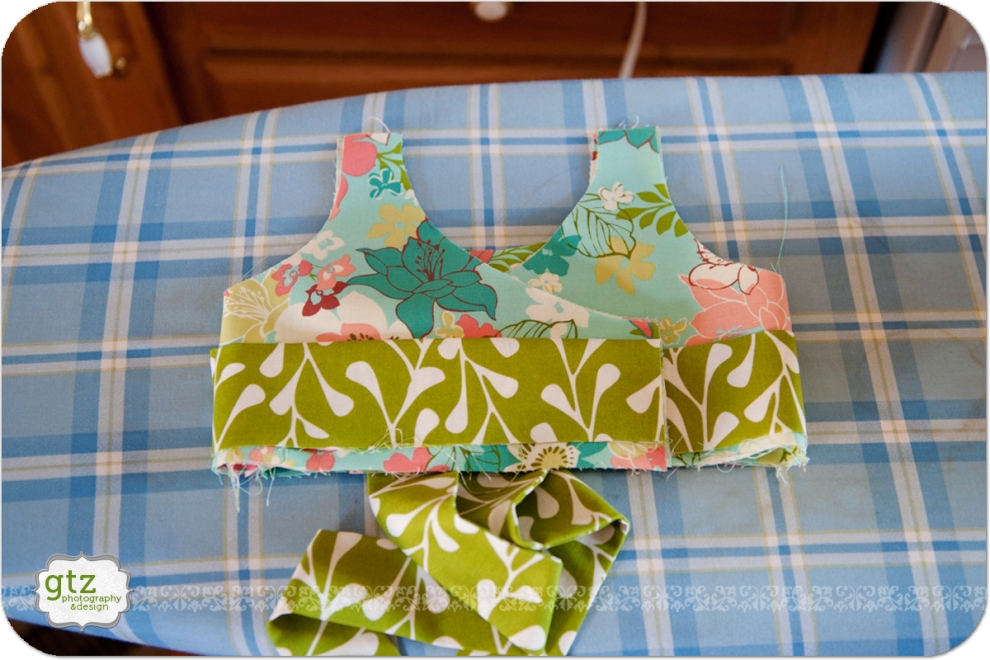
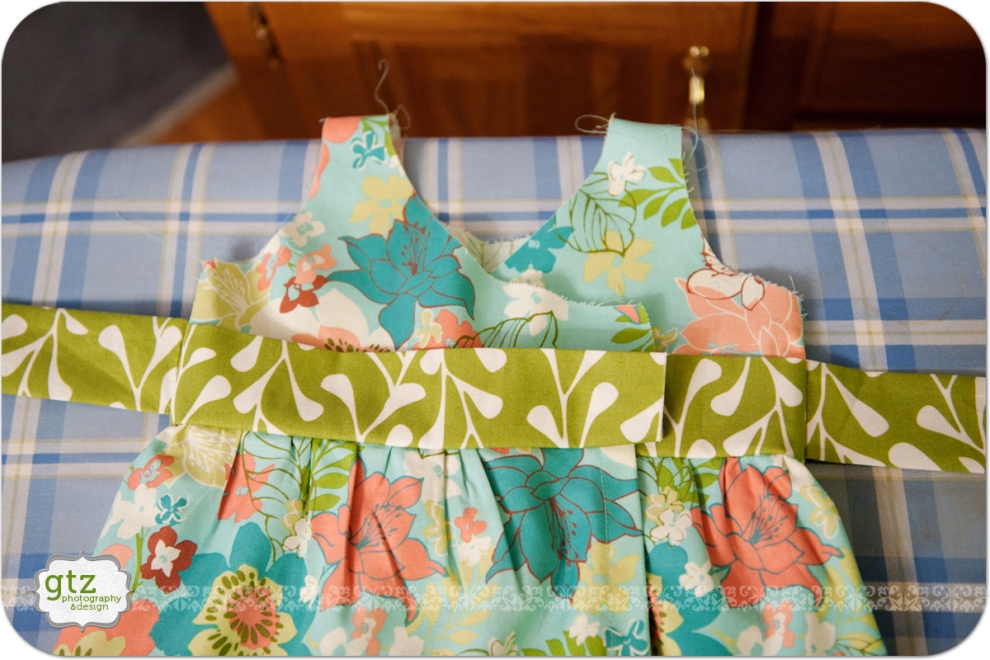
Then lay the front bodice piece that goes to whichever side you are working on right on top of everything else, wrong side up. Pin through all layers, making sure to catch everything so nothing slips when you’re sewing. In the photo below, I have all the layers pinned together, and then I opened it up so you could see how the belt and sash line up with everything else. here, the belt goes off to the left, and the sash to the right, in the contrasting green fabric. Follow the same steps for both sides; then sew (3/8″ seam here) through all the layers along the sides where you have pinned!
This is the same as above, just all put back into place how I sewed it; you can see the belt and sash sandwiched nicely between the layers. And the wrong sides are OUT on the bodice pieces! :)
And here it is all sewn together, and opened up to see how it all looks! You can see my belt is loosely tied, as I mentioned, to keep it out of trouble (don’t you HATE sewing over some “extra” layer that slipped in with what you are *supposed* to be sewing?!)
***
This next picture is just to show how the bodice and lining go together. I took the outer bodice, as in the above photo, and just flipped it over so the wrong side was up; then I laid the bodice lining directly over top of it, with the right side up, to make sure everything was lining up as I had planned. Wrong sides are together in this photo.
And here I took everything exactly as in the photo above, and folded it over like it would be on the dress itself! The sash is still only attached on the one side (the side seams of the bodice), and the shoulder seams are not sewn together yet (that comes next).
***
Next, the shoulder seams. Start with the lining. With everything laid out exactly as in the photo above, I took one shoulder strap, removed the top and bottom layers (which were actually the outer bodice pieces) and was left with the lining shoulder straps, right sides together. Pin them together just like that, for each shoulder.
Once I pinned both shoulder straps together for the lining, I just unfolded the outer bodice off of the lining, and it looked like this:
***
I sewed the lining together at the shoulders, as pinned; and then I repeated the process for the outer bodice; make sure to keep right sides together, line up the shoulder straps, pin, and sew. Are you still ironing your seams open?? :)
Once both outer bodice and lining shoulders were sewn together, I re-layered them to check my work again, and show how they would fit together. (The sashes are just left unfolded here.)
***
Now it’s time to set the bodice aside for a minute and get that skirt hemmed up. Since this is a wrap style dress, it doesn’t actually have to close, but we do have to hem the sides.
Fold the edges over approx. 1/2″, twice, so it’s a nice finished seam, no raw edges, and pin. I angled the bottom edge up so it would be all tucked away nicely when I sewed the hem.

***
After you’ve hemmed the sides, run a basting stitch along the top edge of the skirt, and then gather it up (same principle as the ruffle we made at the beginning.) Your guide for how wide you want the gathered edge to be is the outer bodice, end to end.
***
Once you’ve gathered our skirt, you’ll need to pin it to the outer bodice fabric, right sides together.
Lay the outer bodice out, right side up, but upside down (so the bottom edge is on top and the shoulder seams are on bottom). Carefully line up the sashes where they will need to go, and pin them in place (see photo below.)
Make sure your belt is out of the way, as below:
***
Then lay the skirt, wrong side up, on top of the bodice, lining up the top (gathered) edge of the skirt with the bottom edge of the bodice. The side (hemmed edge) of the skirt should be approximately 1/2″ from the side of the bodice and sash. Carefully pin the skirt in place, making sure to pin through the sash and also making sure the belt is still out of the way. I pinned my belt out of the way.
When you come to the seams where the bodice fronts and back are joined together, I made sure to put a pin in that exact spot, holding the bodice seams open. That way they don’t get all bunched up underneath when you sew over that spot, but instead stay nice and flat, just like you’ve ironed them. Make sure that the gathered skirt edge ends 1/2″ from the other edge of the bodice and sash ends, just like where you started. Adjust the gathers if necessary to leave that extra 1/2″ of bodice/sash extended beyond the skirt on each end.
***
Once you’ve pinned the skirt to the bodice, right sides together–sew it! I think for me this seam was 1/2″, since my basting stitch on the skirt was 3/8″. Then iron all the layers of the seam UP. (It was at some point like this that my husband came by and said something like “Wow, that’s a mess,” referring to all the threads and strings from the raw edges and whatnot, and I then replied with something like “You hushy uppy [as rude as it’s allowed to get in this house with lots of little ears]; I’m not done yet, and those will all DISAPPEAR.”) :)
***
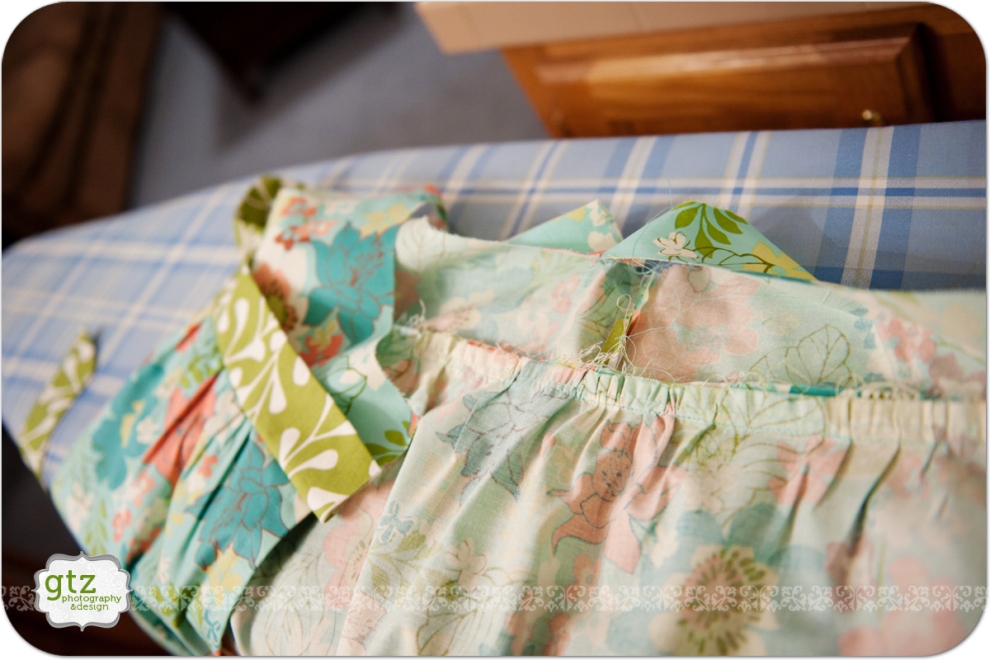
Here you can see that it’s starting to look like an actual dress! :) The sash and outer bodice are now fully connected to the skirt; now to get the lining on there too.
***
Now we need to get the lining attached to the outer bodice. To do this:
First take the bodice lining, wrong side up, and iron the bottom edge of it up approximagely 3/8″. Set aside for a moment.
Next lay the dress all out flat, unfolded, right side up. Next, lay the bodice lining down on top of the bodice of the dress, right side down. (The bodice and lining are now right sides together.) Neither of them will lay totally flat because you’ve already sewn the shoulder seams together, but that’s okay. Pin the very outside edges of the bodice and lining together. (Remember that you left 1/2″ of bodice extending beyond the edges of the skirt on both sides? This is where you will need it.)
***
Once you have the lining pinned to the bodice on both sides, sew where you have pinned. Notice in the photo on the right below, the seam you are sewing should go riiiiiight outside the edge of the skirt.
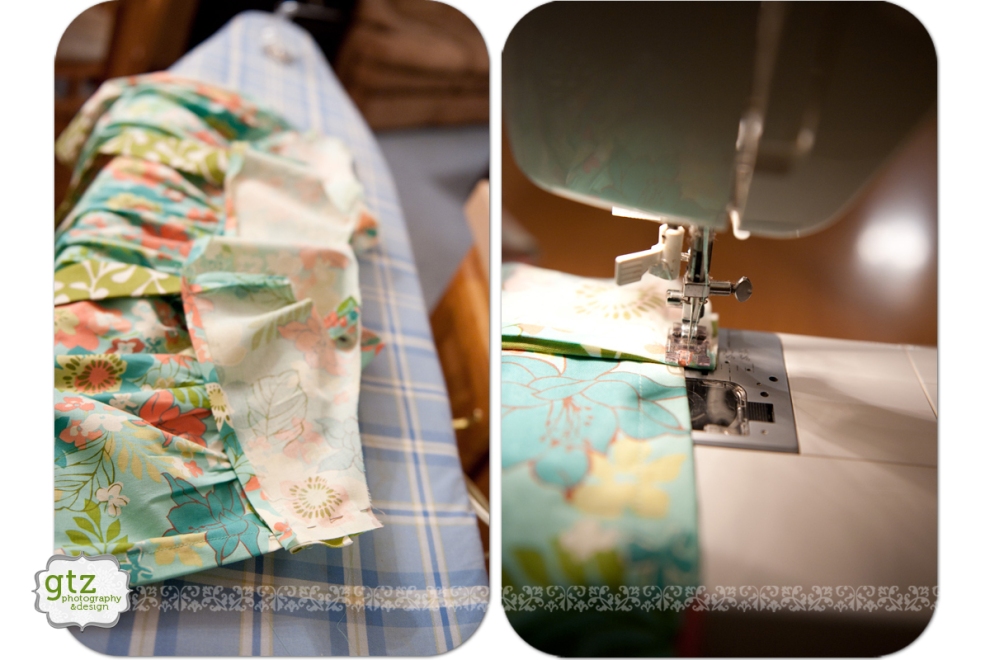
Another photo so you can (hopefully) see it better:
***
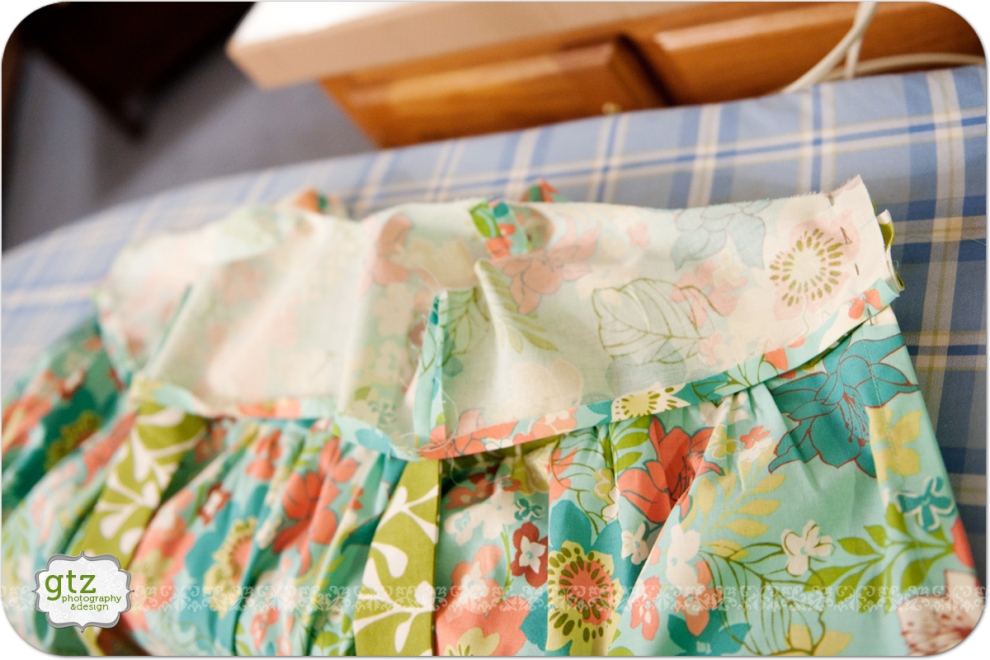
Once you have sewn the side seams together, you will have your bodice and lining now sewn together, but wrong sides out. Flip the lining up and over the bodice and “inside-out” (but really it’s right-side out) so now your lining is on the inside of the dress where it belongs, but with the bottom edge of the lining folded under but still unattached. Where you have folded/ironed it, it should still be long enough that it covers up the seam where the skirt is shown to the outer bodice. If it does not cover that seam, you will need to re-iron it with a smaller fold-over so that it does cover that seam. Then, looking at the wrong side of the skirt but right side of the lining, pin the folded part to the skirt (through all those gathered layers and all, but pin up through the underside of the fabric (as seen below). This will take some “finangling” (in the words of my mother again) but you can do it. :)
***
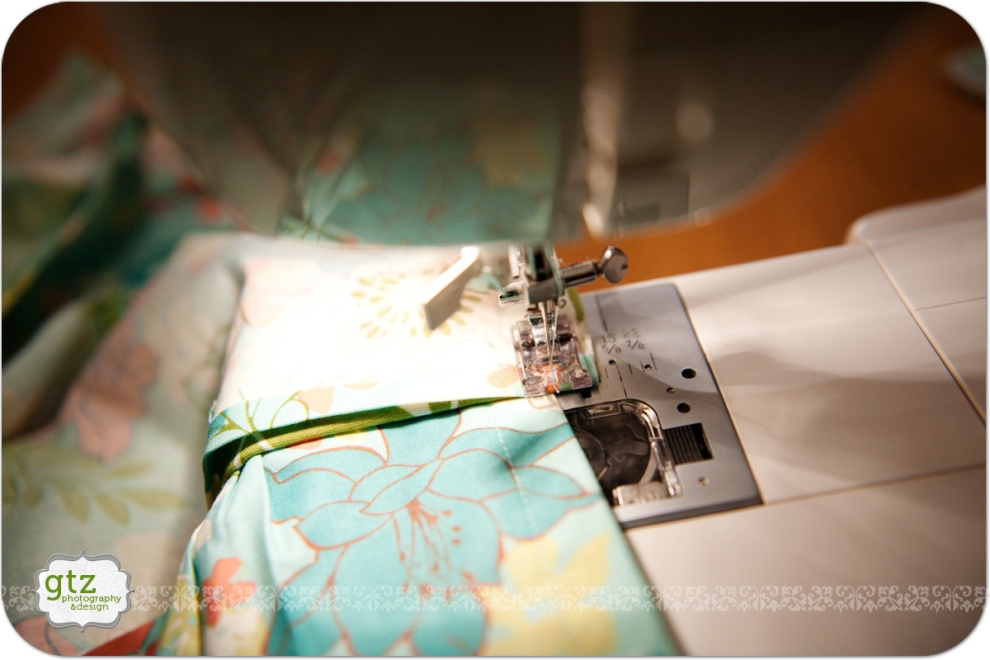
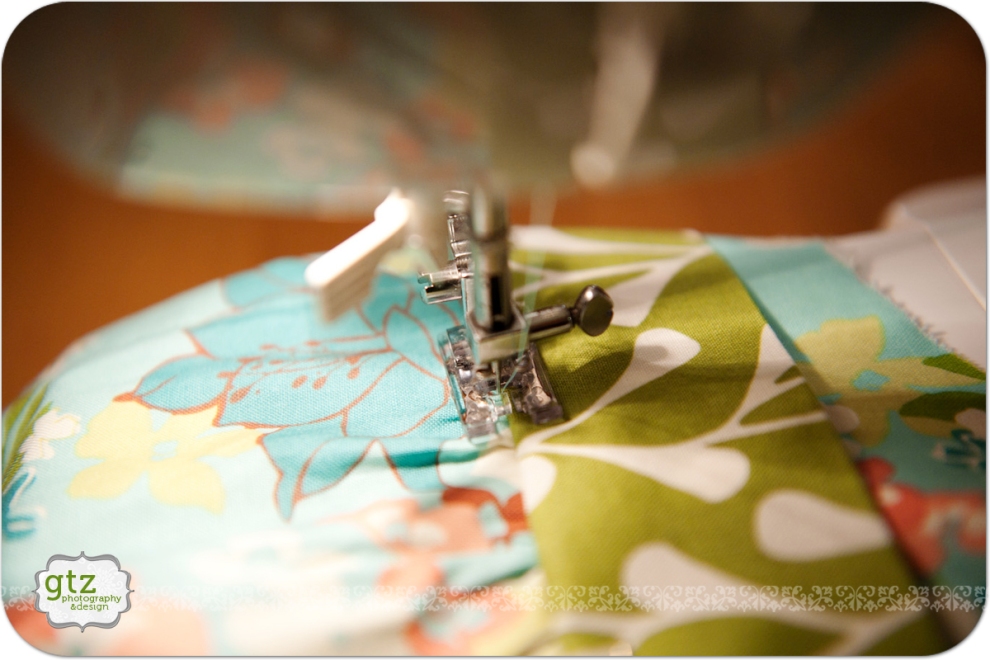
Once it’s all pinned together, turn the entire thing over so you are looking at the right side of the dress, and sew directly *IN* the waistband seam to attach the boding lining. You need to be looking at the outside as you sew so that you make sure you are sewing right in the seam (don’t try to say that last sentence aloud.) :) This is also why you pinned from the underside of the fabric before; so you can now remove the pins as you sew.
Before you sew the entire thing, and as you go, check to make sure you are catching the bodice lining (on the underside) in your seam.
And here it is from the inside of the dress–the bodice lining is all nicely attached, with again not an unfinished edge in sight! :) (That makes me happy.) :)
***
Now it’s time to attach that ruffle from waaaaaaaaay back in the beginning, to the neckline (which is still an unfinished edge.) Line up one edge of your ruffle to the front edge of one side of the dress, adjust the gathers so it ruffles evenly the whole way, and wrap it around the entire neckline so that it ends at the edge of the other side of the front. Now that you know how long the ruffle needs to be, you’ll need to hem the ends. I just tucked the ends inside ever so slightly and sewed it down.
***
Then pin the ruffle to the neckline, lining up the raw edges, so the ruffle is hanging down (rather than pointing up.) :) Sew along the basting stitch to attach the ruffle to the neckline. (Don’t make too wide of a seam here, or your bias tape won’t be wide enough to cover up all the raw edges and the seam; mine was 3/8″ and the bias tape just barely covered everything.)
***
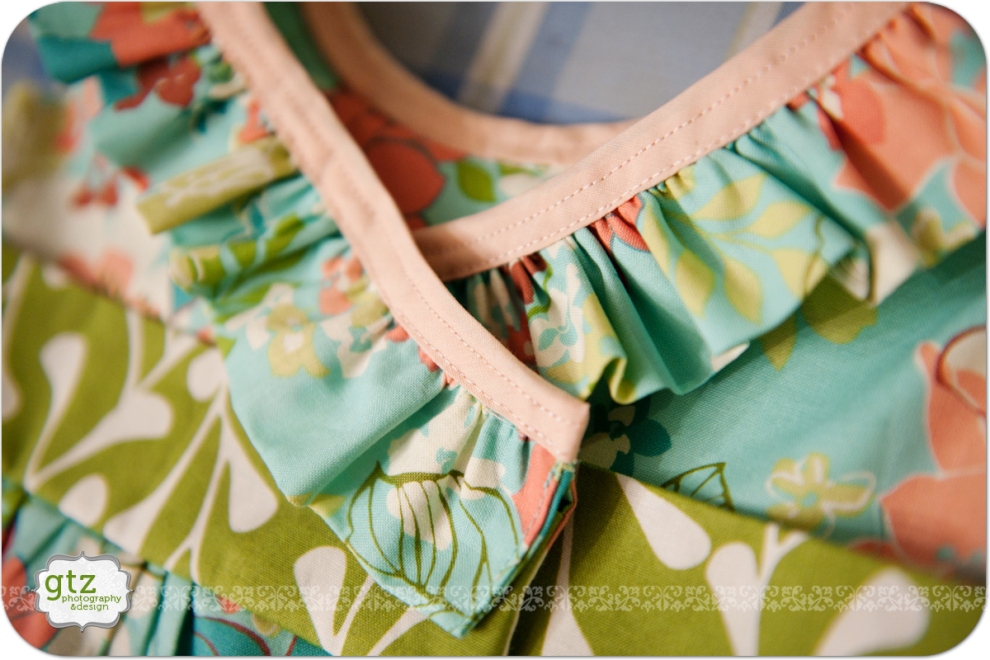
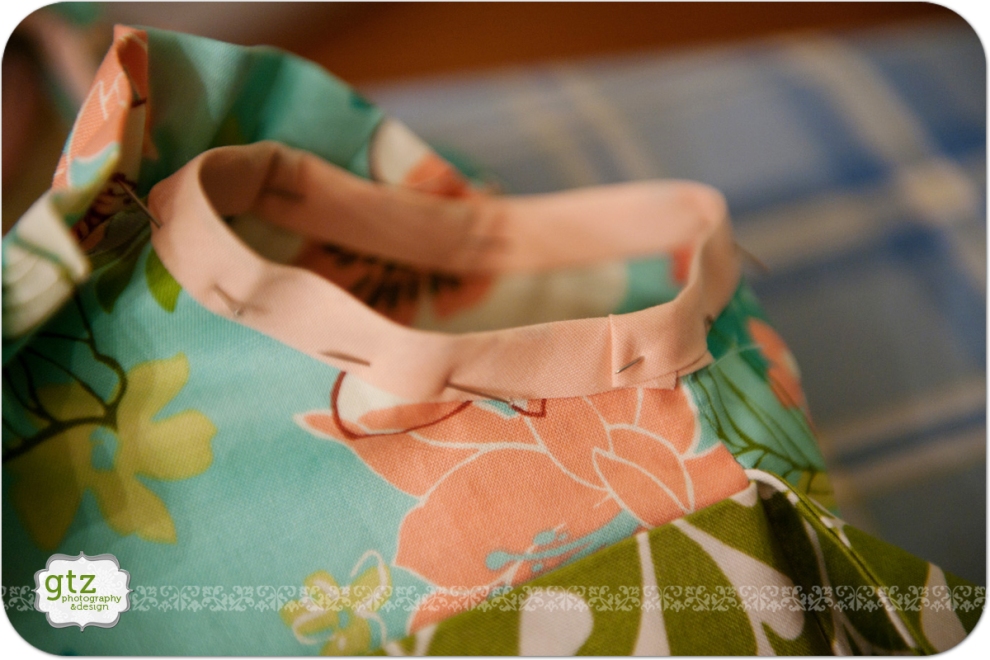
Next, using the folds that are already in your *extra wide double fold bias tape* :) pin the bias tape along the edge of the neckline so that it wraps around all the raw edges and covers up the seam. It’s definitely more important to cover the actual seam on the outside than on the inside of the dress, so if you’re forced to sacrifice ground somewhere, do it on the inside of the dress. Leave some extra bias tape at both ends, so you can fold it under.
***
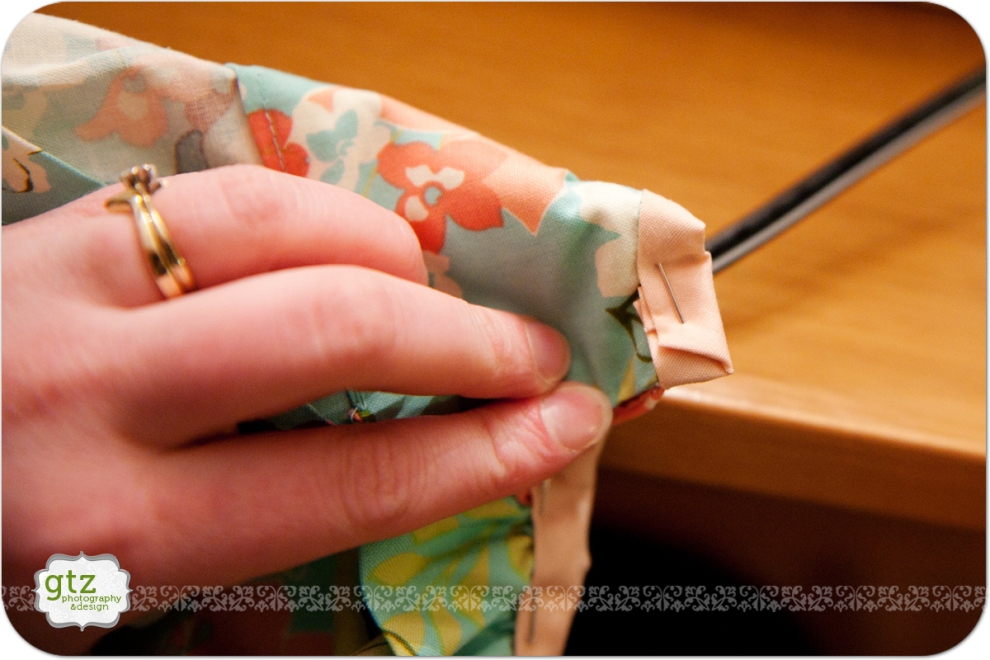
I just sort of tucked and folded the bias tape around the end and under on the inside, so it would all be sewn under like that when I sewed it.
***
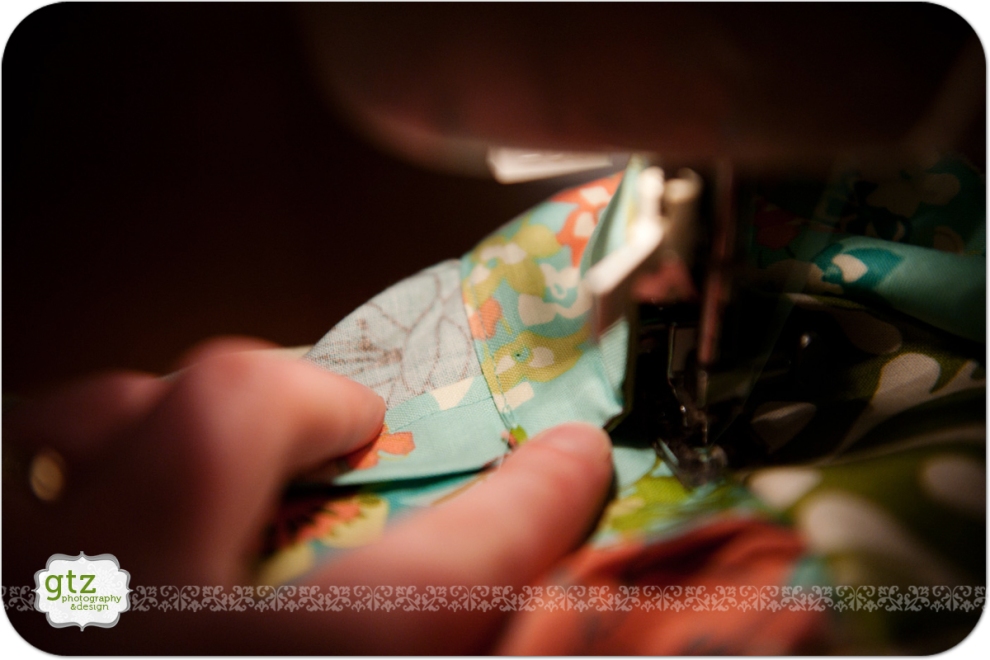
When everything is all neatly pinned, sew it all in place, looking at the outside so you are sure you’re making a neat seam out there where it will be seen.
Upon inspection, I found that I has missed the backside of the bias tape in a few places, so rather than rip the entire seam out and do it over, I just decided to do another line, further from the edge, to catch everything. :) It worked! :)
***
Now you need to use the same technique to pin bias tape around the armholes, only you don’t have QUITE as much “stuff” to worry about wrapping up! Start underneath the arm, pin around as you go, and when you get back to where you started, leave a little extra so you can fold it under and overlap. Then sew it in place!
***
Then all you have left to do is decide how you’re going to make the closure! I had bought buttons, but I just don’t like making buttonholes, I will admit; so I decided to sew the buttons on the front so they were purely decorative; then I happened to have some hook and eye closures in my stash already, so I used those on the inside to actually hold the dress together. Whichever you do, remember that you’ll need two–one at the outside edge that shows, and one inside to the hold the edge of the inside wrap in place. If you’re doing traditional buttons and button holes, sew the button on the inside of the OUTSIDE flap, facing inward, and make the hole on the INSIDE flap, so that inside button isn’t poking through the outside of your dress! Unless you want it to show–then you can do it however you want! :)
***
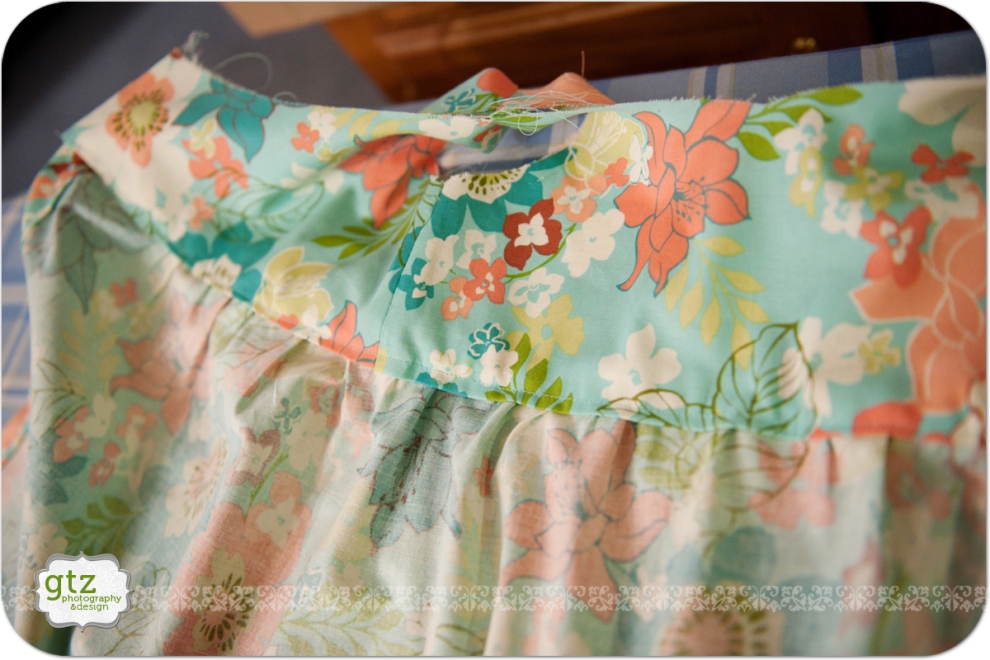
Last but not least—the finished product modeled by Madi herself. :) It is a little big, which I expected, so that V in the front sags open a little. I’ll probably put a little snap or something inside right where they cross to hold it together well–or I could just have her wear a little tank top underneath! I also want to make a matching diaper cover to tie it all in… eventually… :)
Looking back, the next time I make this pattern, I’ll use more fabric for the skirt so it can be fuller. The 44″ width is plenty for a nice full skirt on a “regular” style, but since this is a wrap and therefore overlaps several inches, it just took out most of the “poofiness” that I was originally looking for. Now I know! :)
Did I leave anything out? Was anything unclear? I’d love to hear from you, especially if you try this dress yourself! I’d love to see how it turns out! Even if this is too complicated or just doesn’t float your boat, get creative with your own ideas and make something pretty for SPRING!!! :)












i totally skipped to the bottom to see what she looked like..now I will got back and read the article. great job on dress and post.
Thanks Betsy! About 1/3 of the way through writing it all up, I was thinking, nobody in their right mind is going to read this whole thing if they are not actually making the dress! :)
I just read the entire thing…and I don’t really sew. But looking at this, I wish I did!
-A different Betsy
HOLY SHAMOLY woman! ;) This is AWESOME!!!! I will say I was way lost many times, but I do NOT think that was ever YOUR fault… I ended up skimming in some of the how-to parts… just because my brain is SO fried right now that I can’t even think straight! I LOVE the dress though… I am SUPER impressed with your mad skills!! I love how you so carefully documented with pictures, it seems like anyone wanting to do this shouldn’t have any problems because you can so clearly access the pictures and see exactly what you were saying!! :) Do you remember when you made a dress for Ainsley several years ago? We still have that and it’s waiting for our younger girls to grow into it… then maybe we can even send it to Madi! BUT… we don’t want to wish that too soon now do we?? :) Anyway, you have many talents and it’s so neat to see you use them and especially good to see you document them and share them with others!! :) I know I love to see what you are up to! :) I especially love paying attention to the background in your pictures and seeing your house and silly things that remind me of you… like your cell phone in one of them is sitting on the counter… it’s the stalker in me I guess! ;) LOL It’s just neat to see and see how things are for you guys now! :) I also have to comment on how YOU taught me to iron!! :) Do you remember that??!! I hadn’t ever ironed before and one Sun afternoon I used yours… :) Just a fun memory among the millions I have of our younger years!! :) Again, totally AWESOME post!!! Madi is super lucky to have a mommy that can make her such lovely, PRICELESS things!! :)
Jessica, I DO remember that dress, and I was actually thinking about it as I was planning to make this one! I think I came across the pattern in my sewing box and also some extra buttons that were left over–they were pink butterflies or something, right? And I’m laughing about your background comment–I was actually thinking about that as I was posting the photos, like, Wow, you can see all the junk on my counter, great! :) I didn’t realize it would be a highlight!! ;) And laughing about the ironing too… Every time Victor reads one of your posts he’s like Waaaaaahhhhhh????????? :)
Yes, they were butterflies I believe!! :) She hasn’t fit in it in a while but I am pretty sure that is correct!! :) It’s packed away SAFELY! :D And yes, your backgrounds are a highlight! ;) At least for weirdo me! :) I’m not sure I get what Victor means? Because I’ve totally fallen off the boat? Or am long winded? OR JUST SOOOOOOOOOOOOOO cool??? :D He’s probably just jealous, but I ament (as Ainsley used to say) sure what you mean! :)
oh my goodness………..i am so totally impressed, love it, love it, love it :) now i want to make one. and, like betsy, i scrolled down to the bottom to see if there was a pic of your madi modeling it :)
:) Thanks Mom! You made a good teacher! :) And of course I had to include a photo of Madi. :)
I wanted to “like” this comment thread… but I guess that isn’t an option on this site! ;) LOL
I came back to look at the tutorial. I skimmed through it because, of course, I am not planning on making one. BUT, I think you did a fantastic job of laying out the tutorial with your photos along the way. I especially was impressed that you put in your two-cents worth about what you would try next, such as the double row gathering stitches and using a fuller fabric for the body of the skirt. Madi’s modeling skills have been honing in since birth so it looks like she knows just what to do. It will be interesting to hear comments of those who try it. I’m impressed with how you are using your many talents to share with others.
Aunt Sandy, I’m glad you had a chance to take a look, and thanks for the kind comments! :) I hope that someone is maybe able to make one from following this and I too would love to hear how it goes if anyone does!
I made the receiving blanket from that site you posted the other day (THANK YOU). How intimidating it would be to have to “show my work” as I go. You really can’t cheat if you are going to write a how-to! Thanks for the effort. I might have to do this dress when I get more time, and warmer weather. (or, really I should start now so it’s done before Christmas lol)
Haha! I’m laughing at your Christmas comment, Betsy! :) I’m glad you enjoyed the site I posted; I’m still drooling over a couple patterns on there, but trying to decide if I can make them up or if I need to buy them. ;) I saw the picture you posted of the receiving blanket–it turned out really nice!!
Thanks for such a great tutorial! It inspired me to make an A-line version for my daughter’s first birthday. (I blogged about it here: http://www.cookcleancraft.com/2011/10/ruffled-wraparound-toddler-dress.html)
Narelle, I loved your version! So simple and really lovely! I’m glad my post was an inspiration to you, and love how yours turned out. :)
Okay, I don’t know how I came across this post, but I MUST make this dress. You’re awesome! I’ve never seen a toddler dress this creative and unique-looking…and I’ve made many! Has anyone made this dress? I see you posted it about a year ago. I’ll probably buy the fabric tomorrow and finish it sometime during the week. Pictures forthcoming!!
I know that at least one other person has made a “variation”–she commented here with a link. Other than that, I know it has been pinned many, many times on Pinterest, but I don’t know for sure if anyone has actually made it! :) I need to do another one this year, as this one is definitely too small now! :/ They just grow toooooo fast!!
What a cute dress. I am a very accomplished seamstress but have never attempted made my own pattern you did a great job! (I have taken several patterns and put them together.)
I will have to save this tutorial to make later for my new grand baby girl.
What a cute dress. I have a 4 year old named Madelyn. I think I will try to make this dress for her. She would be thrilled!
Great tutorial! You’ve been featured on the Quality Sewing Tutorials blog.
We hand select only the best free tutorials and patterns for the home sewist.
Grab a brag button!
I just used this tutorial to make a dress for a friend’s daughter. I’ve been sewing for almost 20 years (since I was 7) and I’ve used so many patterns. This was easy to follow and I LOVE the pics as you go along. Thank you for taking the time to put this together!
You are very welcome! I had no idea it would be such a hit when I posted it, but I’m glad it is helpful and inspiring to so many! :)
Pingback: Select Riley Blake Fabric 50% w/Coupon Code @Fat Quarter Shop « On A Sewing Afternoon
So well done! Thank you.
Hey! I plan to make a version and use your tutorial as a help! I’ll post a link when I’m done! :)
I LOVE the fabrics…what a pretty, pretty dress! Pinning this for future inspiration :-)
I love them too–I only wish I had bought more at the time, because I can’t find them any longer! :(
http://sewingmamaraeanna.blogspot.com/2012/04/wrap-shirt.html – Here’s my finished product! Thank you again for your time and work to put this tutorial together!!!
Super cute! I love the different fabrics and how you put it all together!
Very cute, thank you for the pattern.
this dress is lovely, I am just finding it now. Beautiful
What a lovely dress! Stopping by from Me Sew Crazy and pinning so I can remember to make one for my daughter. PS love the blue fabric. Where did you find it?
Really cute!!! I can imagine this dress with a more fancy fabric choice, as taffeta or silk duppioni and it will be a wonderful flower girl model. I really have to give this a try. Thanks a lot for your hard work posting this so complete, step by step, tutorial, that was very generous from you to easy the work for the whole sewing mamas community!!!
So beautiful. You did a great tutorial and pics. Well done. What type of Singer sewing machice do you have? Thanks so much….
I honestly don’t know what kind it is, as far as model number… It quit working a while ago and I am currently borrowing a Brother something or other that is quite nice. :) The Singer was a very basic model that my husband bought for me at Walmart not long after we got married, and it served me well!
I LOVE this design & your fabric choices. I have a few questions: 1) Approximately how much did all the supplies cost? 2) Where did you get your beautiful fabrics? 3) I would like to try this dress in a 5T, what adjustments do I need to make to the measurements?
I…. can’t remember how much everything cost, I made the dress over a year ago and I guess I didn’t keep very good records. :) I bought one yard of the blue and half a yard of the green, from what I remember, so that part would just depend on how expensive your fabric is or if you already have fabric you want to use. I’m guessing not over $20 for everything. I bought everything at Joann’s, but again, it was over a year ago and they no longer have those fabrics in stock, if that is what you were wondering. To adjust for a 5T, there are some great “pattern drafting” tutorials out there that could help you with that! I don’t have a particular one I use, but you could even just use a shirt that fits whoever you’re making it for as a basis for the size of the bodice, and then just use more fabric for the skirt, meaning wider and longer if you want it longer. A lot of times kids really get longer but not much wider in those “2T-5T” years, so it will just depend on the little one you are making it for. Do lots of measuring and planning out in advance. :)
This dress is so cute! I do not own a serger either, so I love your techniques to hide the edges! Thank you so much, this dress is on my to-do list…
What a beautiful dress and your tutorial is so clear and concise.Thanks for posting!
What a fantastic idea to play with!! My Sophia’s turned out so cute!
Really Cute.! Can’t wait to try it.
I made one of these this past summer and finally got around to blogging about it :) Thanks for the tutorial. I loved the look and was immediately inspired!
http://ajaire.blogspot.com/2013/01/elephants-and-ruffles.html
After reading your tutorial, I thought I would give this dress a try! I loved making it! Thank you very much for taking the time to post and help some of us out when on a creativity binge! I used purple and green.
I would love to make this for my almost 8 month old. How would I change the length of material?
Having a two year old named Madelyn myself, this dress is perfect!
well done, a cute result. thanks for your work!
lately, i posted a tutorial for an easy summer dress too: http://kleinekleinigkeiten.wordpress.com/2013/08/08/easy-peasy-tut/
i’m definetely going to try out yours ;)
warm regards
Pingback: the party dress | deriving mommyhood
Hi! I made this dress with a fee variations for my daughter. I have had several people ask me to make one for them but wanted to get your permission. Please let me know if that’s ok or if I’d need to buy the rights to do so. Thank you!
You are more than welcome to make and share dresses with others! That’s what sewing is all about, right? :)
Yes, I just wanted to make sure bc I usually have them pick out their own fabrics and pattern then I charge a certain amount per hour for sewing. Since I have the pattern, I’m not sure how that would work. I’m just trying to give credit where credit is due.
No worries. I’m not concerned about it. This was just a random experiment that happened to become very popular via Pinterest. :) My blog is mostly a photography blog–I only wish the photography would get as much interest as this one little tutorial! ;)
Thank you.. I love the dress and I’ll sew like it for my grand daughters..
I had picked a pattern and was wanting to alter it and didn’t know how! This was perfect! In your opinion why wouldn’t you add a lining to the skirt? The fabric I have needs to be lined— should I not ? Will the lining not lay flat with the dress
Samantha, I didn’t line this one because the fabric didn’t really need it. As long as you pick a fairly lightweight lining fabric, it shouldn’t cause a problem in bulk. I would cut it to the same dimensions as the skirt, but a little shorter, depending on the look you are going for. I myself only attach the lining to the skirt at the hem if I’m making a bubble skirt, but that is up to you! :). Hope it works out well for you!
Pingback: Wrap Shirt
I am about half way through making this dress. Love it! I do have a question. It seems that top of the sash pieces on the front are never sewed down. Does this catch food? Any problems when washing?
Hey Chrissy, you’re right, I personally left the top loose! I don’t remember food collecting in there… She’s in a size 6 now so it’s been a while. :) And I had zero problems in the wash–mine was super secure. You certainly could sew down the top if you prefer it that way!
I cannot wait to get started making this dress. I’m so impressed you came up with the pattern on your own! How did you know the measurements for a 2T dress? Just for future sewing projects. I can’t ever seem to get the sizing quite right if I’m not following a pattern. Thanks!
Hi Sarah, thanks for your comment! As far as the measurements go, dresses are so forgiving, especially for little girls! I just used the bodice pattern (drawing, really) that I liked in the blog post; and then the skirt I just figured out how long I wanted to make it, and used the entire width of the fabric. The skirt can be as full and long as you want–that part is really up to you! The bodice is the trickier part, and like I said, I used someone else’s sketch which happened to be in a 2T I think to get started. It’s been a while… I think I’m remembering everything right. ;)